
DIY Mailbox Makeover With Contact Paper Liner
Th3
Quick summary: Give a tired mailbox a fresh, budget-friendly glow-up by lining the interior with contact paper, updating numbers/decals, and sealing for weather resistance an easy project you can finish in an afternoon with basic supplies and a little patience. (Inspired by community projects on Hometalk and other DIY blogs.)
Why line a mailbox with contact paper?
Mailboxes take a beating: damp junk mail, muddy flyers, and the occasional soggy postcard. Lining the inside with contact paper or shelf liner instantly looks neater and makes cleanup easier. A patterned liner can peek through the mail slot and add personality without repainting the whole unit a tiny design win with big curb appeal. DIYers and homeblogs often recommend using contact paper as an affordable, low-tech finishing touch on mailbox makeovers.
What you’ll need (materials & tools)
- Contact paper or decorative shelf liner (outdoor-friendly pattern or vinyl style recommended).
- Spray adhesive or heavy-duty permanent spray glue (optional for extra hold).
- Rubbing alcohol and a clean rag (for prep).
- Utility knife / sharp scissors.
- Squeegee or credit card (for smoothing bubbles).
- Clear outdoor sealer (acrylic spray or outdoor Mod Podge) if you plan to seal the liner for extra protection.
- Optional: new mailbox numbers (vinyl or metal), spray paint for the exterior, painter’s tape, sandpaper.
Step-by-step: mailbox liner makeover
1. Pull the mailbox apart and prep
Remove the mailbox from its post if possible (it’s easier to work on a bench). Take off numbers and the flag so you don’t accidentally cover them with adhesive or paint. Clean the interior thoroughly with soapy water; finish with rubbing alcohol to remove wax and greaseadhesion loves a clean surface.
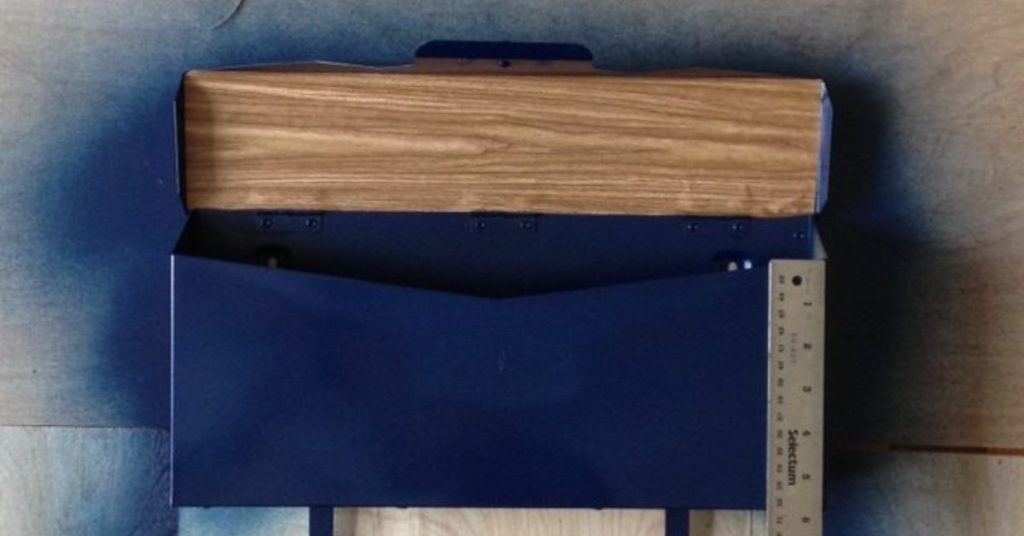
2. Measure and cut
Measure the flat panels inside the mailbox: base, left and right walls, and the underside of the lid. Transfer the shapes to the back of the contact paper and cut slightly oversized pieces (an extra ⅛”–¼” makes for easier alignment). If your mailbox has rounded corners, make small relief cuts in the liner so it hugs curves without wrinkling.
3. Test-fit before sticking
Position each cut piece inside without removing backing to confirm fit. This “dry run” prevents mis-cuts and reduces stress when you go live. If your contact paper has a directional pattern, make sure pieces align so the grain or repeat looks intentional.
4. Apply: technique for a bubble-free finish
Peel 4–6 inches of backing, align the top edge, and press the exposed area into place. Slowly peel and smooth with a squeegee or a stiff plastic card as you go. For large panels, spray a light mist of soapy water onto the mailbox surface first this lets you slide the liner into perfect position before it grabs permanently (a trick popular for countertop and window film installs). If you want extra grabbing power on a metal mailbox, a light coat of a moisture-resistant spray adhesive will help the liner resist peeling over time.
5. Trim and finish edges
Trim excess with a utility knife for razor-clean edges. If the door closes over the liner edge, tuck the margin slightly under the lip it looks neater and reduces water creep. Replace the flag and numbers. Consider swapping the old numbers for reflective or vinyl address decals for better night visibility and a modern look.
Protecting your liner: weatherproofing & sealers
Contact paper is usually made from vinyl or laminate and is fairly water-resistant, but constant exposure to sun, snow and rain shortens its life. Crafters commonly use “outdoor” Mod Podge or a clear exterior acrylic sealer to add protection but note that even Mod Podge Outdoor is water-resistant (best for sheltered spots) and not a permanent waterproof guarantee. For a mailbox exposed directly to the elements, choose a high-quality UV-stable acrylic spray sealer or a marine-grade clear coat for the longest life. Layering a sealer over edge seams helps stop water from getting under the liner.
Design ideas & style tips
Classic & subtle
Choose a neutral wood-grain or stone-look contact paper inside and pair it with black or brass numbers outside for a timeless look.
Breezy coastal
Light blue, sea-glass patterns, or soft stripes inside + white mailbox exterior = beachy curb appeal.
Playful pattern pop
Go bold with a floral, tropical, or geometric liner that peeks through the mail slot fun without overstaying its welcome.
Common problems & solutions
- Peeling at corners: Use a small bead of outdoor-grade clear silicone under the corner before pressing the liner down for long-lasting hold.
- Wrinkles: Gently lift the nearest corner and reapply using the wet-surface trick or a light spray adhesive; smooth outward from the center.
- Sealer clouding the pattern: Test your sealer on a spare scrap first some glossy finishes can slightly darken or alter printed patterns.
Is contact paper a permanent fix?
Not exactly. Contact-paper liners are an affordable and cute short-to-medium-term solution that drastically improves appearance and ease of cleaning. For a permanent, heavy-duty overhaul you’d replace the mailbox, powder-coat the metal, or install vinyl decals and professional-grade exterior wraps. But if your goal is a fast, inexpensive refresh with minimal tools, contact paper is a brilliant choice many DIY blogs recommend.
Quick budget breakdown
Most contact paper rolls cost between $5–$20 depending on size and pattern. A can of spray adhesive or outdoor sealer runs $6–$15. New vinyl address numbers start around $5–$20. In short, you can do a charming mailbox liner refresh for under $30 if you already own basic tools or splurge to $50–$75 for premium materials and a sealed finish.
Safety & USPS rules (brief)
When customizing a curbside mailbox, keep the exterior color and the address numbers visible and legible for postal workers. Don’t alter the mailbox size or the location of the flag in a way that prevents mail delivery. If you replace the mailbox entirely, check USPS curbside height and placement guidelines for proper installation.
Final checklist before you finish
- Mailbox clean, dry, and sanded where needed.
- Liner cut and applied with no large pockets of trapped air.
- Edges sealed or tucked; numbers reinstalled.
- A final clear coat applied only after testing on a scrap piece for compatibility.
- Mail slot operates freely and exterior looks tidy from the curb.
Conclusion
Contact-paper liners are an easy, wallet-friendly way to refresh an old mailbox and add a personal touch. With careful prep, the right adhesive, and an exterior sealer selected for your local climate, this modest DIY yields big curb-appeal payoff and gives you one more reason to smile when the mail arrives.
Meta & publishing details
sapo: Want a quick and cheap mailbox glow-up? This step-by-step guide shows you how to measure, apply, and weatherproof a contact-paper liner for your mailbox. Learn tools, adhesive tips, sealer choices, and design ideas so your mailbox is tidy, easy to clean, and full of curb appeal all in an afternoon. Whether you like subtle neutrals or a playful pattern peeking through the slot, this DIY is beginner-friendly and pocketbook-friendly, too.
Personal experiences & extended notes ()
I’ve tried the contact-paper-mailbox trick on two different mailboxes in different climates, and the lessons are practical: first time, I used a pretty printed vinyl liner on a mailbox that sits under a large, protective porch overhang. Because it’s sheltered, the liner lasted a full three seasons with only minor lifting at a corner. My secret was cleaning well, using a light spray adhesive on tricky curved spots, and applying an outdoor acrylic sealer (test-sprayed on a scrap first). That project gave the yard a sudden “intentional” look neighbors asked where I’d bought the mailbox.
My second attempt was more of a stress test: a rural mailbox exposed to sun and rain. I used a durable, thick contact-paper vinyl and sealed seams with clear construction adhesive dabbed into the edges. Even so, the liner began to show wear after a year the UV and temperature swings are relentless. The takeaway: contact paper is a brilliant short-term facelift, but in full sun and rain you’ll either need to reapply every 12–18 months or move to a higher-grade solution like a powder-coated replacement mailbox or professionally applied vinyl wrap.
Design-wise, simpler patterns age better. Busy, highly detailed prints hide dust at first, but the sun fades complex colors faster than a single-tone liner. I found that choosing a pattern that complements the house trim (rather than matches it exactly) makes the mailbox feel thoughtfully integrated. Another trick: use the liner only inside and pick a crisp, contrasting number color on the exterior this achieves the “designer” look without asking the liner to withstand the entire climate on its own.
Technically, application technique matters more than brand. I once bought an expensive “designer” liner and rushed the install; wrinkles and trapped moisture ruined the effect. Later, using a simple roll of reliable shelf liner and taking my time with the squeegee, I got a cleaner result that lasted longer. If you’re nervous about bubbles, practice on a small metal box or a section of scrap sheet metal you’ll learn how the liner behaves around curves and seams.
Finally, don’t forget maintenance. A quick wipe with a damp cloth every few weeks keeps the interior clean and lets you spot early lifting before dirt gets under the edge. If you notice peeling, reseal the affected edge with a bead of clear silicone and press the liner down. For those who love seasonal changes, the low cost makes swapping liners for holidays or seasons a joyful, low-stakes habit think gingham for summer, evergreen for winter, or a floral for spring. It’s an easy way to express style without a full mailbox replacement, and every time the mail carrier or a visitor glances your way, you get a tiny design victory.